Zones and spaces
A zone is a group of spaces of one kind — a row of stalls, a car park level, a block of units. Spaces live in zones, and a new space takes its kind and default charges from the zone it is added to.
Add a zone
-
1Open
Open Zones
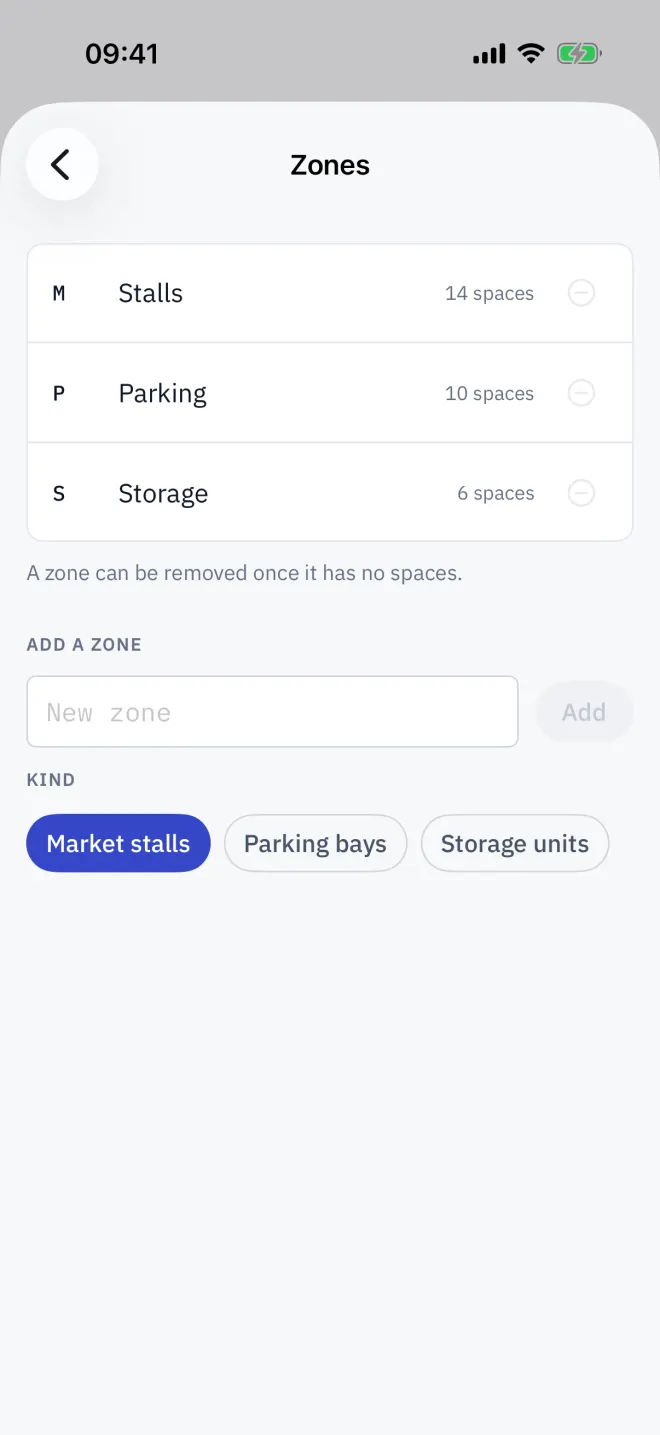
Go to Settings → Spaces → Zones. Each zone shows its ID, its name and how many spaces it has.
-
2Name
Type the zone ID
In Add a zone, type a short ID such as B or L2 in the New zone field. It is stored in capitals and becomes the start of each space code.
-
3Kind
Choose its kind
Pick Market stalls, Parking bays or Storage units, then tap Add. The zone appears as a chip on the Spaces tab once the site has more than one zone.
Add a space
On Spaces, pick the zone's chip and tap Add space. The New space editor opens with the next free code in that zone, such as A-21, the zone's kind, and that kind's default charges. Change anything you need and tap Save.
Rename, move or remove
- Rename a zone by editing its name in Settings → Spaces → Zones; the ID stays.
- Move a space to another zone with the Zone choice in its editor.
- A zone can be removed once it has no spaces.
- Delete a space from its editor with Delete space. This also deletes its history, so use Move out instead when a tenant leaves.
Default rents
Settings → Spaces holds a default rent for each kind. It applies to new spaces only; spaces you already have keep their own rent.
Read next
The plan and its colours
Read Letnook's Spaces plan: every stall, bay or unit is a cell coloured Paid, Due, Overdue, Vacant or Not billed yet. Switch to List, filter by zone, search.
NextLetting a space
Put a tenant in a Letnook space: open it on the plan, tap Edit space, add the tenant name and contact, check what the space is charged, and save.
NextA tour of Settings
A tour of Letnook's Settings: Pro, Site (name, due day, tax), Spaces (zones, default rents), Getting paid, Region and language, Data, Help and the Danger zone.